miércoles, 15 de febrero de 2012

Pisame ésta!

Stepped this!

Proyecto de: Crave, Daf y HellLois.
Project of: Crave, Daf and HellLois.


Y por fin continuamos.... donde lo habiamos dejado!!!!!!!!
At last we continue......where we left it!!!!!

Tras "finalizar" la estructura principal, toca darle caña a los detalles. Aqui podeis ver la continuación de nuestros helado-ascensores:
After "finishing" the main structure, we step on it to details. Here you can see the continuation of the ice cream-elevators:


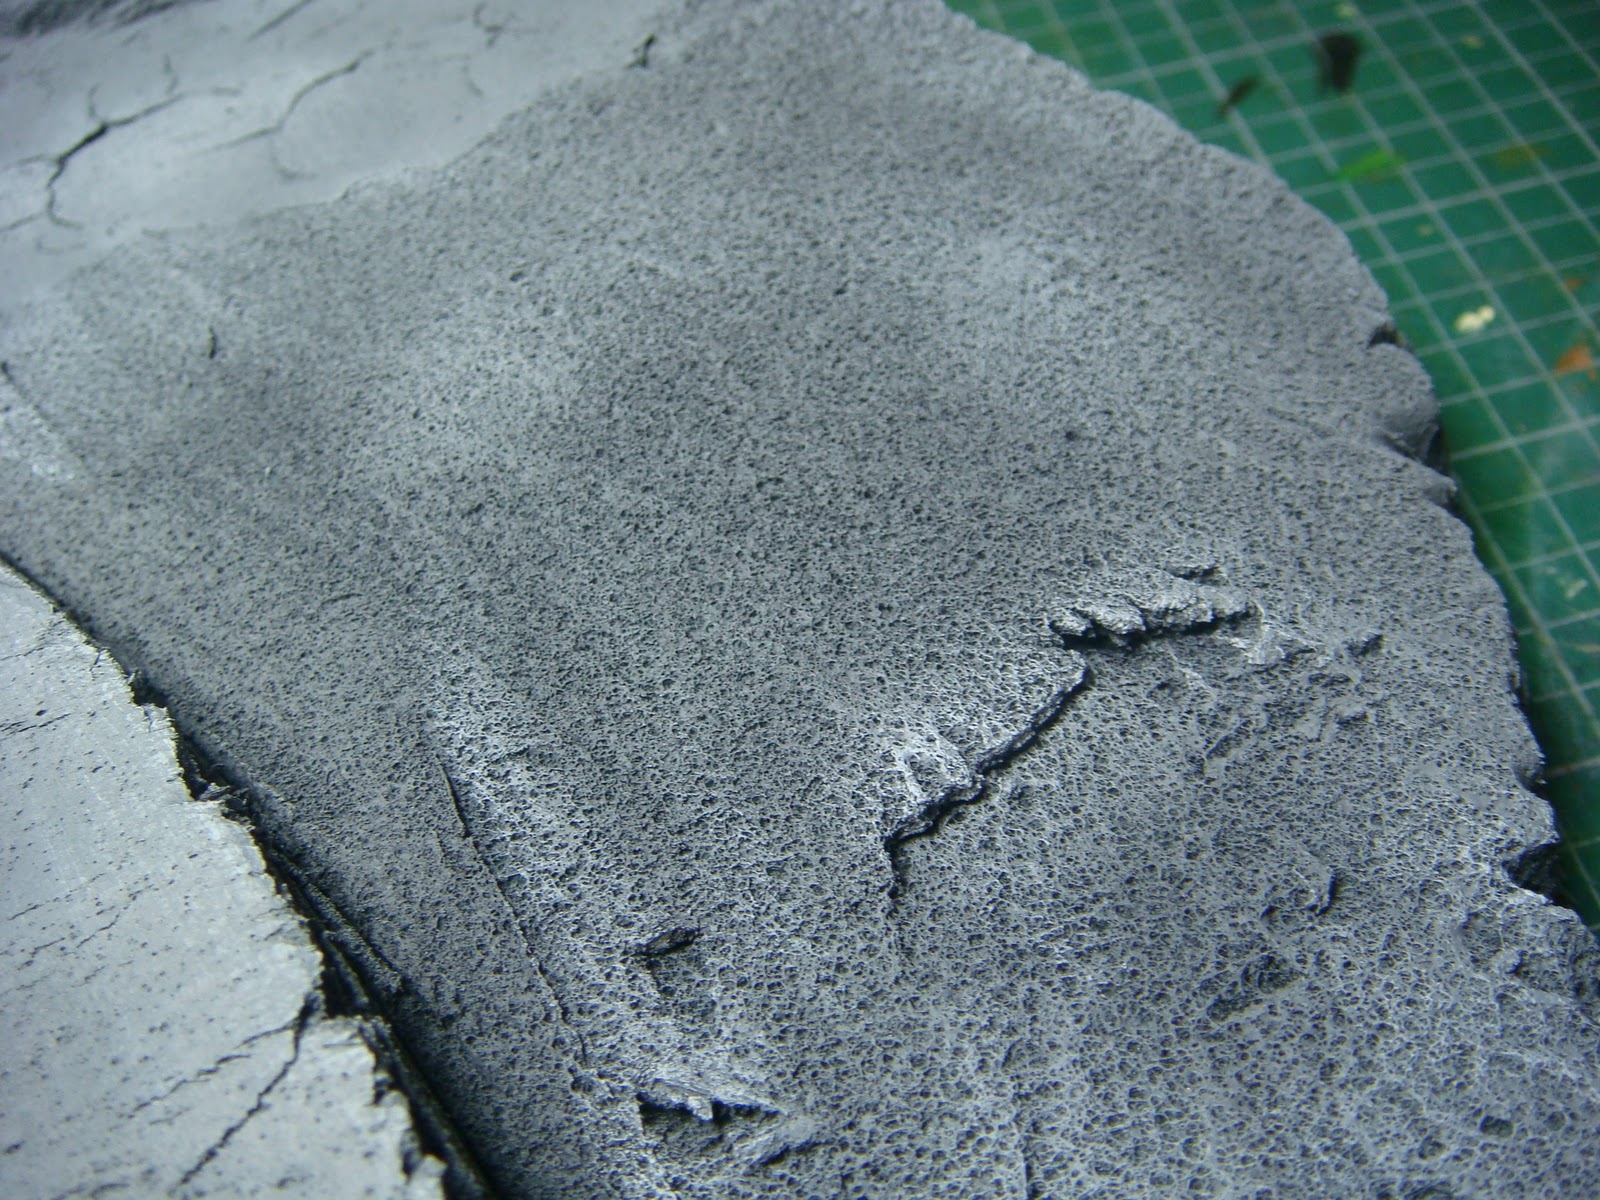
Para anclarlos perfectamente a las columnas, realizamos dos paredes con cartón pluma.
To fix them perfectly to the pillar, whe make two walls with foamboard.

También necesitaria un techo, en este caso usamos trozos de tarjetas de crédito, de teléfono,etc... lo que viene siendo plasticard de andar por casa.
Also it would need a roof, so we use pieces of credit card, phone card, etc... Plasticard homespun.

Y para darle un pequeño detalle más, realizamos una puerta hexagonal con plasticard. Para marcar las lineas de apertura utilizamos un cutter.
And to give a little more detail, we made an hex door with plasticard. To make the open lines we use a cutter.


Parece sencillo, pero cuando tienes que realizar este proceso 3 veces por planta llega a ser agotador... tan agotador y aburrido que todavía no lo hemos terminado.
Its looks easy, but when yo have to make it 3 times per floor, it can be exhausting... so exhausting and boring that we have not finished yet.


Al mismo tiempo que realizamos los ascensores, nos pusimos de lleno con el suelo. Dudamos bastante como hacerlo, si malgastando material, si dejarlo plano, si cuadraditos.... hasta que HellLois nos descubrió su maravillosa y rara manía de pequeño: Guardar las tarjetas de teléfono que se usaban en los 90!!!!!!
At the same time that we do the elevators, we work hard on the floor. We doubt long enough how to do it, if wasting material,  if leave it flat, make squares... until HellLois discovered to us his wonderfull an wierd mania when he was a child: Kept phone-card that wer used on the 90!!!!

Y no tenía pocas, no.... cerca de 200!. Separó las que podrian ser reliquias de algún friki coleccionista y usamos el resto para lo siguiente:
And he doesnt has a few, no.... close to 200! He separated which could be relics for some freak collector and we use the rest for the next:


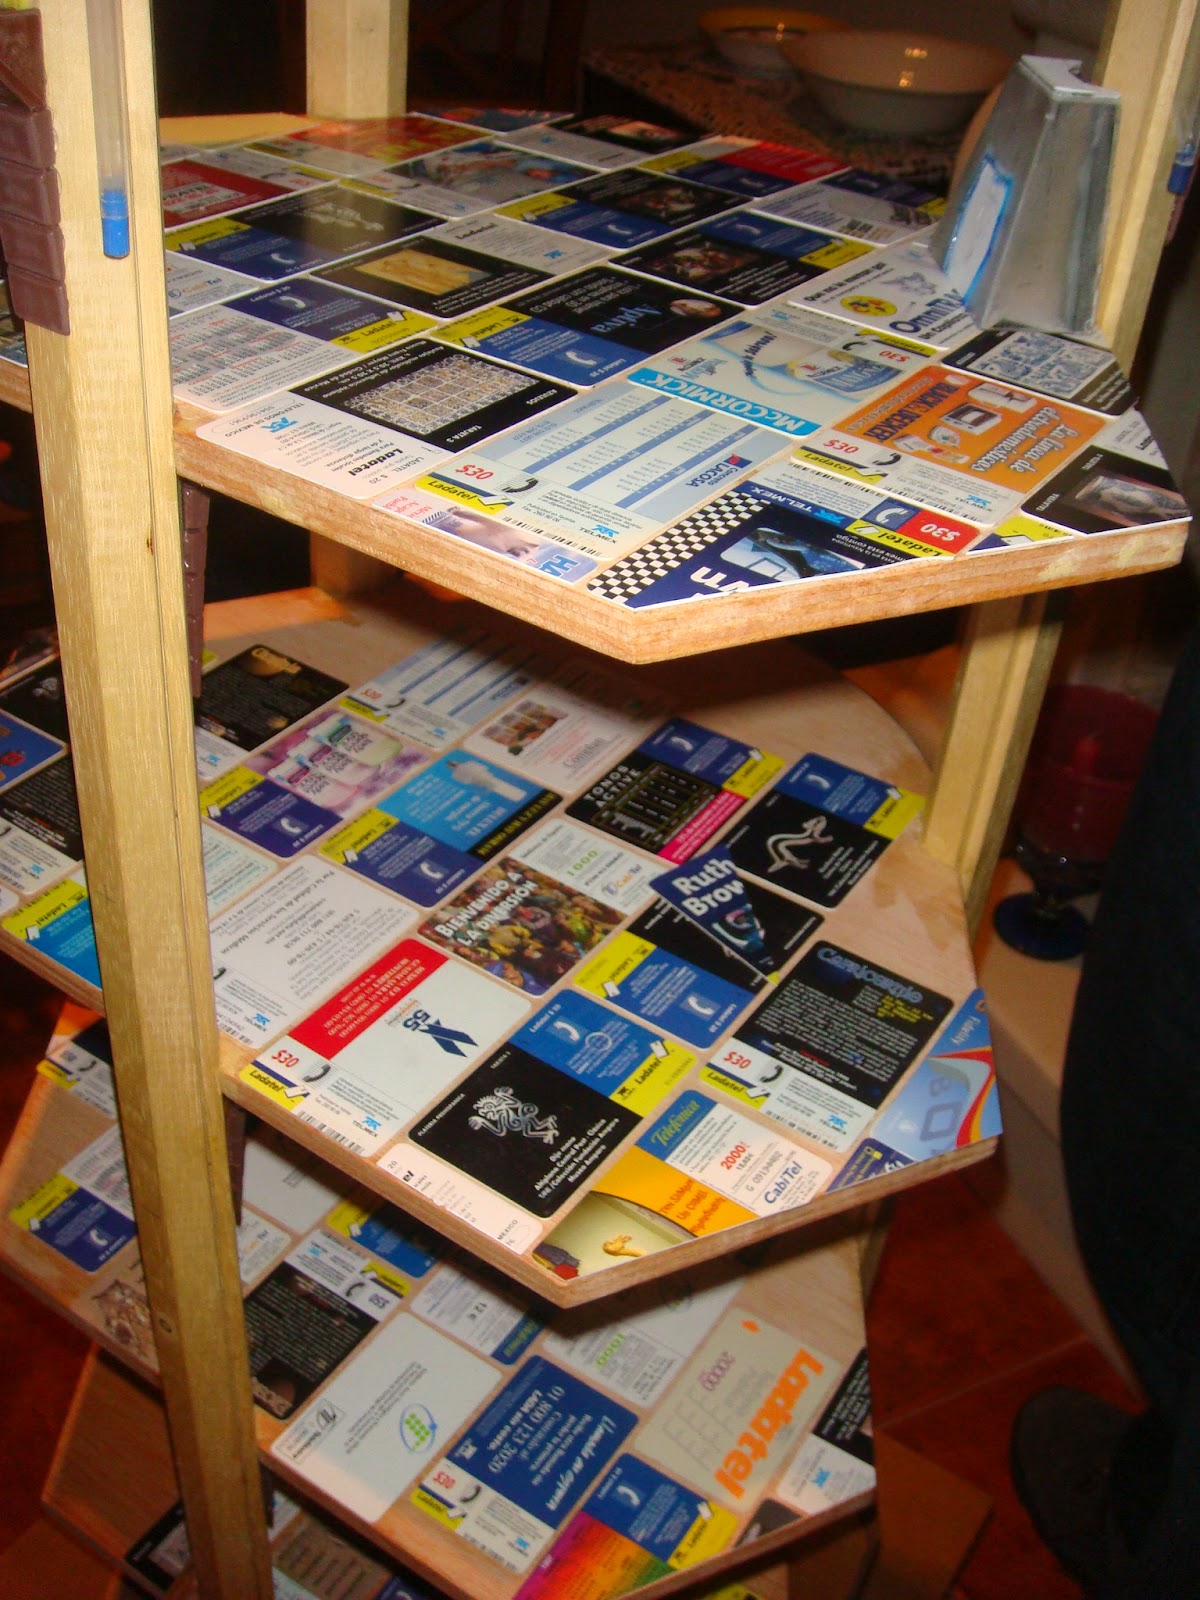
Dejando pequeños huecos de aproximadamente el grosor de 3 tarjetas, fuimos rellenando el suelo de las plantas y pegando asi las tarjetas con cola.
Leaving small gaps about the thickness of 3 cards, we were filling the base of the floors and gluing the cards with glue.
Como podeis apreciar muchas de ellas fueron cortadas con cutter para amoldarlas al espacio necesario.
As you can se, man cards were cutted with cutter to fix them to the floor.


miércoles, 8 de febrero de 2012

Bunker!

Proyecto de: HellLois.
Project of: HellLois.


Volvemos a la carga con el edificio, pero mientras preparamos la entrada y acabamos los detalles, para hacer la espera un poco más amena. Os dejamos un pequeño proyecto de un bunker.
We return to the charge with the building, but while we prepare the post and the details just to make the wait a little more pleasant. We show you a small project of a bunker.


El envase es de rúcula, creo recordar, cuando lo iba a tirar lo vi y dije: "¡Ehh un bunker!" así que lo guarde y ahora mucho tiempo después vamos a transformarlo.
The pack conteined arugula, I think, when I saw it was going to throw it away and I said: "Ehh a bunker!" so I keep it and now long after we will change it.


Para darle consistencia, decidí colocarlo en una plancha de poliestireno extruido, le daremos textura para que parezca una gran roca, donde estará nuestro bunker.
To give consistency, I decided to put in a board of extruded polystyrene foam, we will give texture to look like a large rock, where it will be our bunker.

Una vez planeado y dibujado sobre la plancha de como sera el acceso a la parte de arriba y donde ira el bunker, trabajaremos en el para que no se vea la plancha.
Once planned and drawn on the board as will access to the top  and where will be the bunker, we work on the board so you do not see the board.

Le quitaremos al envase el borde para poder ajustarlo mejor a la plancha.
We'll take to the package the border to adjust better to the board.


Con una lija triangular gorda y un cutter vamos dando textura a placer.
With a big triangular sanding and a cutter we give texture to pleasure.


Después con un tubo, un bote de un puro o la probeta, fui aplastando poco a poco toda la superficie, para que no fuese uniforme y darle las grietas y desniveles a la base. Y para finalizar con una capa muy fina de spray de imprimación, para que se "comiera" la superficie y hacer rugosa la superficie.
Hay que tener cuidado en este paso, por que este material se deshace con los sprays, los pegamentos instantáneos, como el "Loctite"
After with a tube, a bottle of a cigar or a test tube, I was slowly crushing the entire surface, so that was not uniform and give cracks and unevenness at the base. At the end with a very thin coat of spray primer, to "eat" the surface and roughen the surface.
Be careful in this step, because this material dissolves with the spray, instant adhesives, such as "Loctite" 


Aproveche los huecos que tiene el envase para que fuesen los anclajes de la estructura sobre la base, unas tapas de pegamento y de unas jeringuillas serán lo que hagan que encaje y serán unas luces estupendas.
I take advantage the hole of the package, to convert them in the anchorages of the structure on the base, a tops of glue and tops of neddles will be the anchorages and will be a nice lights.

La base la pinte con aerógrafo, primero una capa de negro, luego, un poco de azul intermedio, que le da un tono muy interesante a la piedra. Después es ir subiendo los tonos con gris hasta llegar a blanco.
Los bordes y las ranuras con pincel seco y blanco para dar los puntos de luz máxima.
I painted the base with and airbrush, firt whit a coat of black, then, wgit a little of intermediate blue, a very  interesting shade for the stone. After I going up to gray and after up to white. Ridges and grooves with dry brush and white to give the points of maximum light.


¡ Próximamente el bunker!
Soon the bunker!